WowRevenue – A First Look at the “Relatively New” WooCommerce Discount Plugin
This is the first look at the WowRevenue plugin – a WooCommerce discount management plugin. It’s been in the market for a little over 5-6 months. This is just a general overview of the plugin, I’m not going to dive too deep into the details.
In this overview of the WowRevenue WooCommerce Discount Plugin, I will be discussing the view and feel of the plugin. It’s a plugin from WPXPO, a WordPress-based software company.
I’ll try to answer the following questions:
- What is the purpose of the plugin?
- What will a user find for the first time?
- What is the general way to create discount offers?
- What is the overall feel – is it old-school? Or is it a modern plugin?
Let’s start!
The Purpose of the WowRevenue Plugin?
I visited the site only to find the tagline to be:
“Boost Sales and Maximize Revenue Growth”

In simple words, it’s trying to elevate the ‘numbers’ of your WooCommerce store. Let’s face it, if you’re just getting started (you probably don’t know the first thing about sales), then it’s natural to want to grow your sales.
That’s what WowRevenue is trying to do. It’s trying to help you get better sales numbers online. And that, in turn, will improve the revenue growth of your store.
But the thing is, how are they doing it?
What is the purpose of this WooCommerce Discount Plugin?
Since the plugin looks to increase sales of your online WooCommerce store, it offers a selection of discount campaigns you can use on-site.
The ones it’s offering are:
- Normal discounts: Offer ‘normal’ discounts to products or a specific category of products.
- Bundle Discounts: It’s one of the more popular use cases out there. Bundle products and offer specific discounts on them
- Volume Discounts: Offer a discount on products in volume
- Buy X Get Y: It’s often known as BOGO discounts. You buy one product and get another product for free.
- Mix and Match Discounts: These are your custom bundles. Users get to create their ‘own’ bundle and buy it from your store.
- Frequently Bought Together: This is another type of ‘special’ bundle. You simply create a bundle of items that users “typically” buy together from your store.
- Free Shipping: You can use this either as a ‘progress bar’ or a simple message and offer free shipping to users.
- Spending Goal: For the spending goal, you give the user a target amount – if they spend that amount on your store, they either get a special discount or free shipping.
- Double Order Plus: Users can 2X, 3X, 4X, or even go higher on their orders from the cart page.
These are the 9 different types of discount campaigns you can create with WowRevenue.
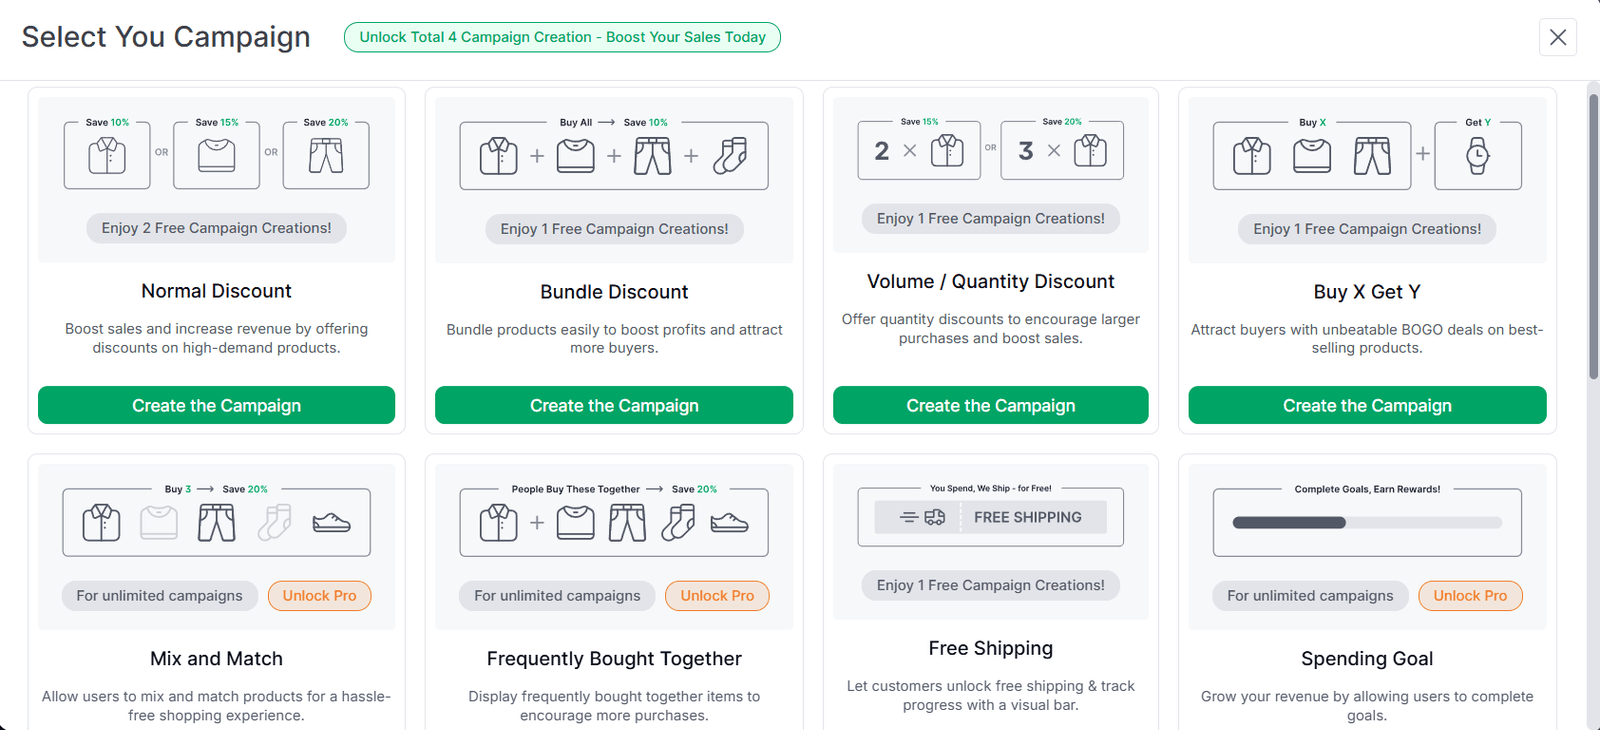
There are 4 more campaigns that are coming to the platform later on – these are the buy x get y bundler, stock scarcity, countdown timer, and the next order coupon.
Please note that you can create up to 5 campaigns in the free version at the time of writing this overview. Within the campaign, there are some other restrictions as well.
Initial Impressions: From Installation to First Use
For the initial impressions, I used a locally hosted WooCommerce site with the Astra theme. Everything was pretty much set to default.
Before using the plugin, you’ll need to install it, of course.
Installing the plugin is like installing any other plugin on WordPress. You simply search for the plugin on your WordPress dashboard and install the free version.
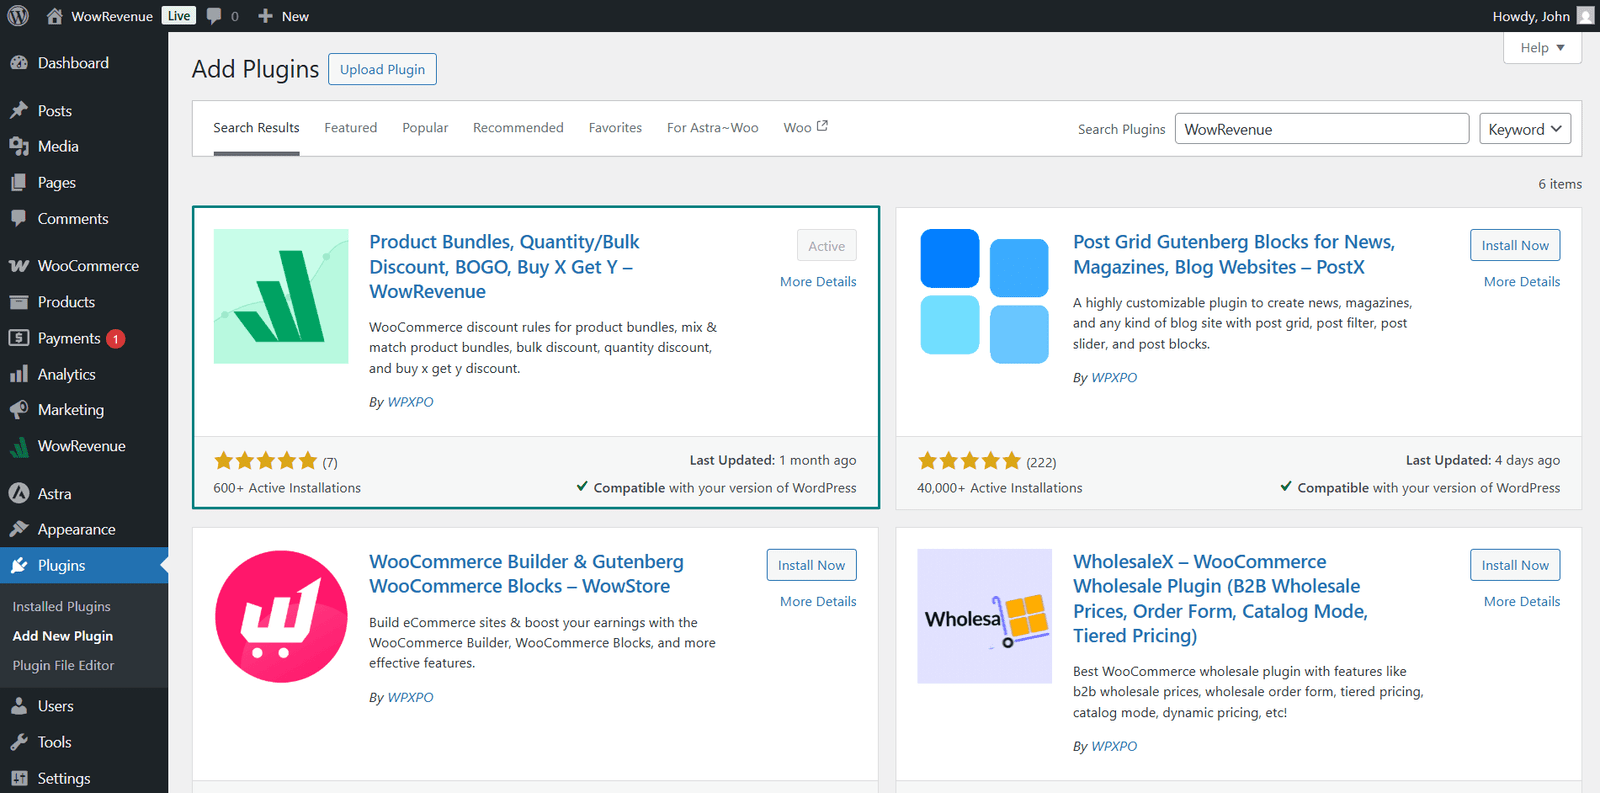
The pro version installation is a bit different, though. You need to download it from the WPXPO dashboard, install it on the WordPress website, and activate it using the license you purchased.
Using the Plugin for the First Time
When you install the plugin for the first time, you do not get to the ‘create campaign’ screen (at least that’s what I found). You see the dashboard that shows the numbers related to sales.
Now the dashboard is quite extensive, though – here you have:
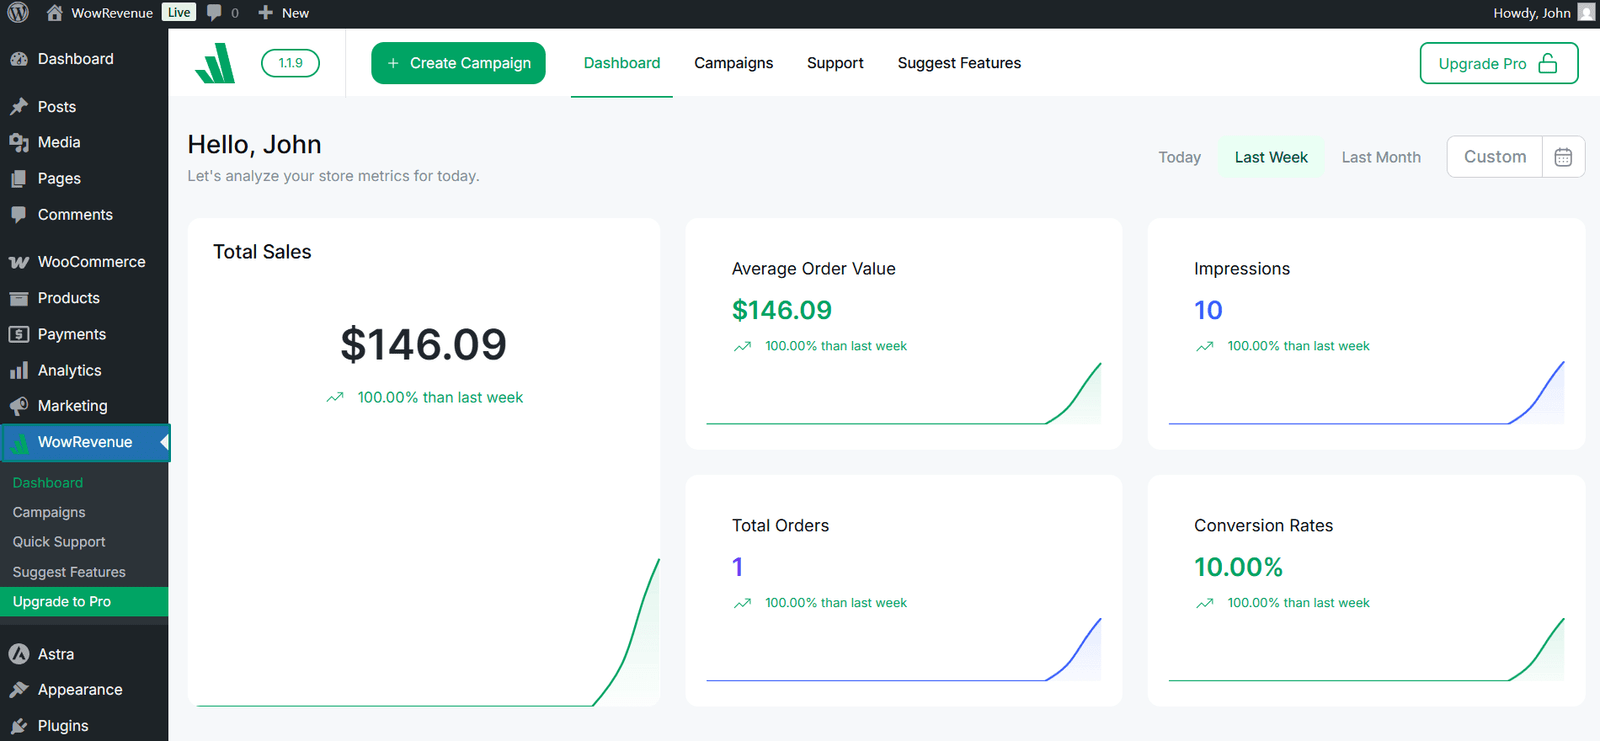
- The total impressions on your campaigns
- The average order value numbers
- Total orders placed through campaigns
- Best performing campaigns
- Total conversions
- What items does a user add to the cart
- And more…
You need to click on campaigns, then click on “Create Campaign” to create your first campaign.
That’s pretty much it.
You could suggest features or get support from the dashboard. It’s what most plugins do – you should come to expect it at this point.
How Do You Create a WooCommerce Discount Plugin with WowRevenue?
The thing is, creating any type of discount offer is quite similar – for any type of discount campaign you may want to create with WowRevenue.
Though there are “a few” different settings for a few more “complex” campaigns, the gist of it is the same. That’s neat.
To create any sort of campaign with WowRevenue, you need to:
Select the page – where will the campaign show?
You can choose and activate (or deactivate) certain pages from the “pages” setting.
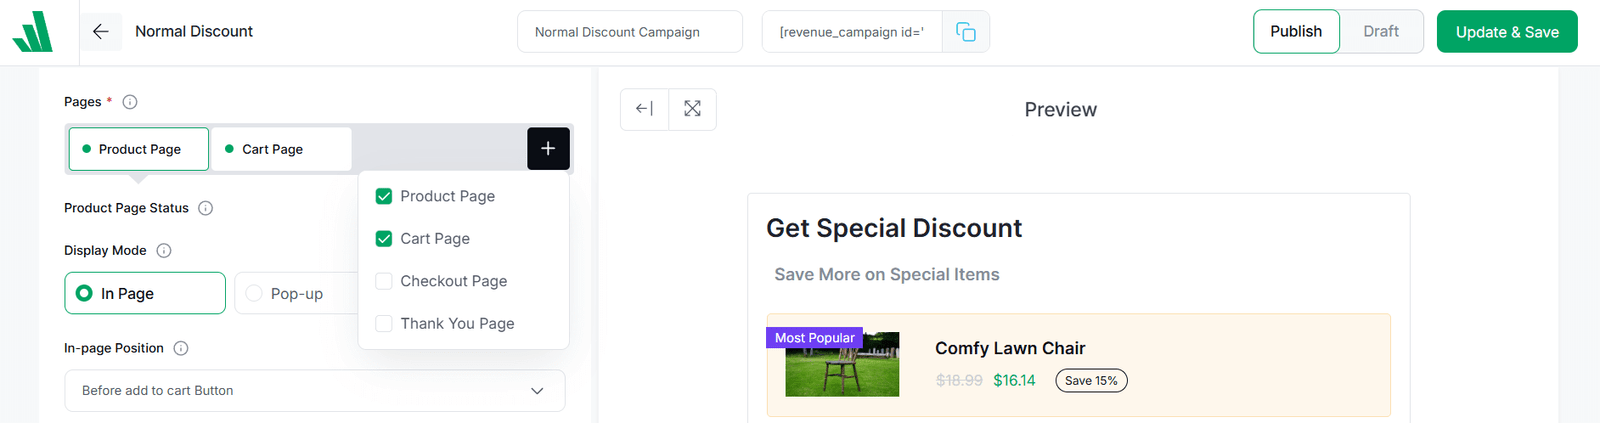
Set the appearance – how will the campaign look?
There are 3 types of campaign appearances you can choose from – popup, floating, or In-page. A drawer-type appearance is also available for some campaigns.
Choose the trigger product/ category – which product or category shows the discount
At this point, you’ll need to choose the trigger product or trigger category – it’s the product or category for which the discount will show.
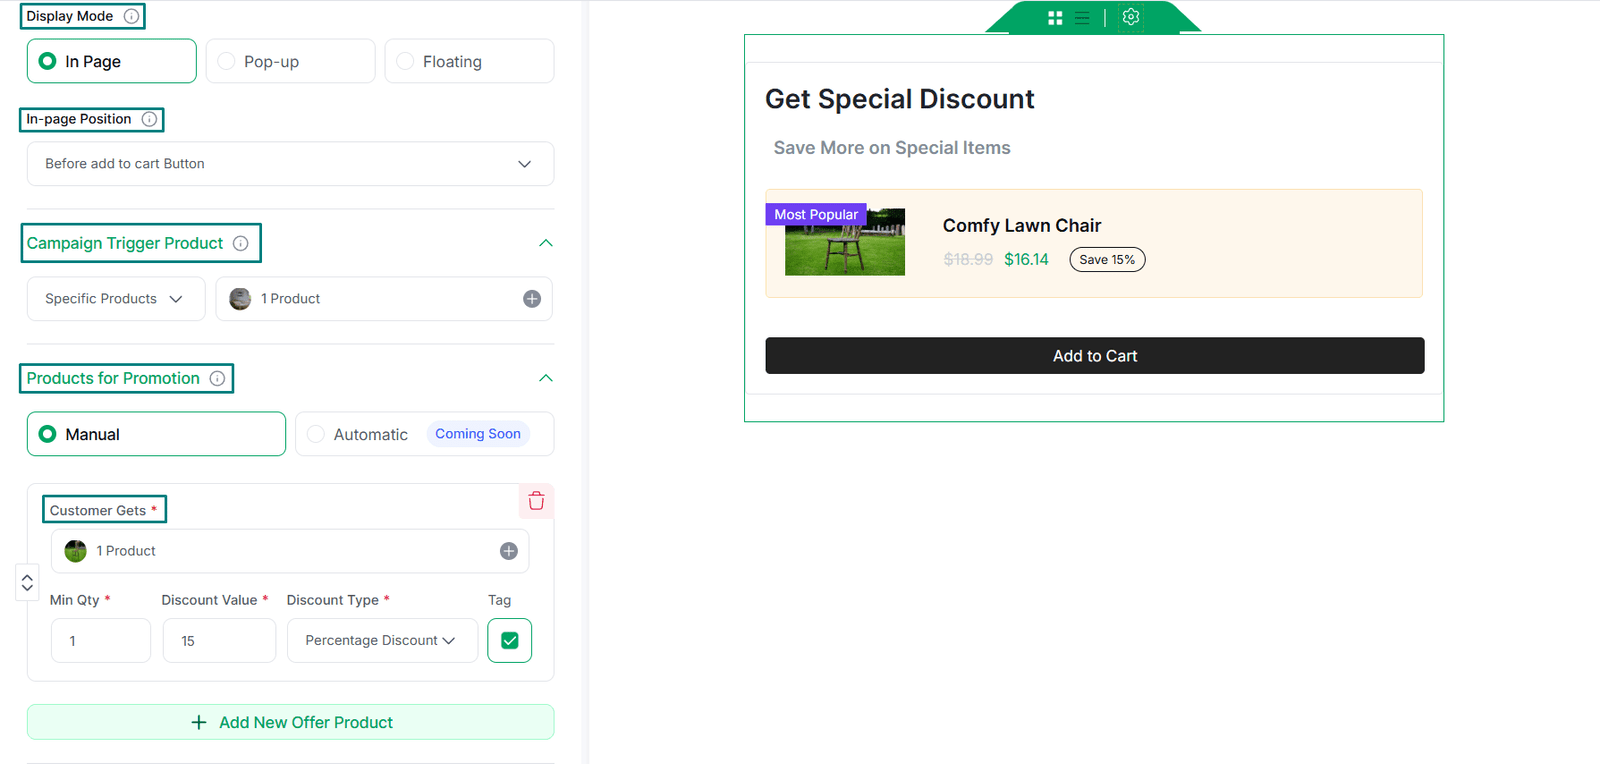
Set the Discount Offer
Then you get to set the discount offer – you offer multiple products along with different discount types.
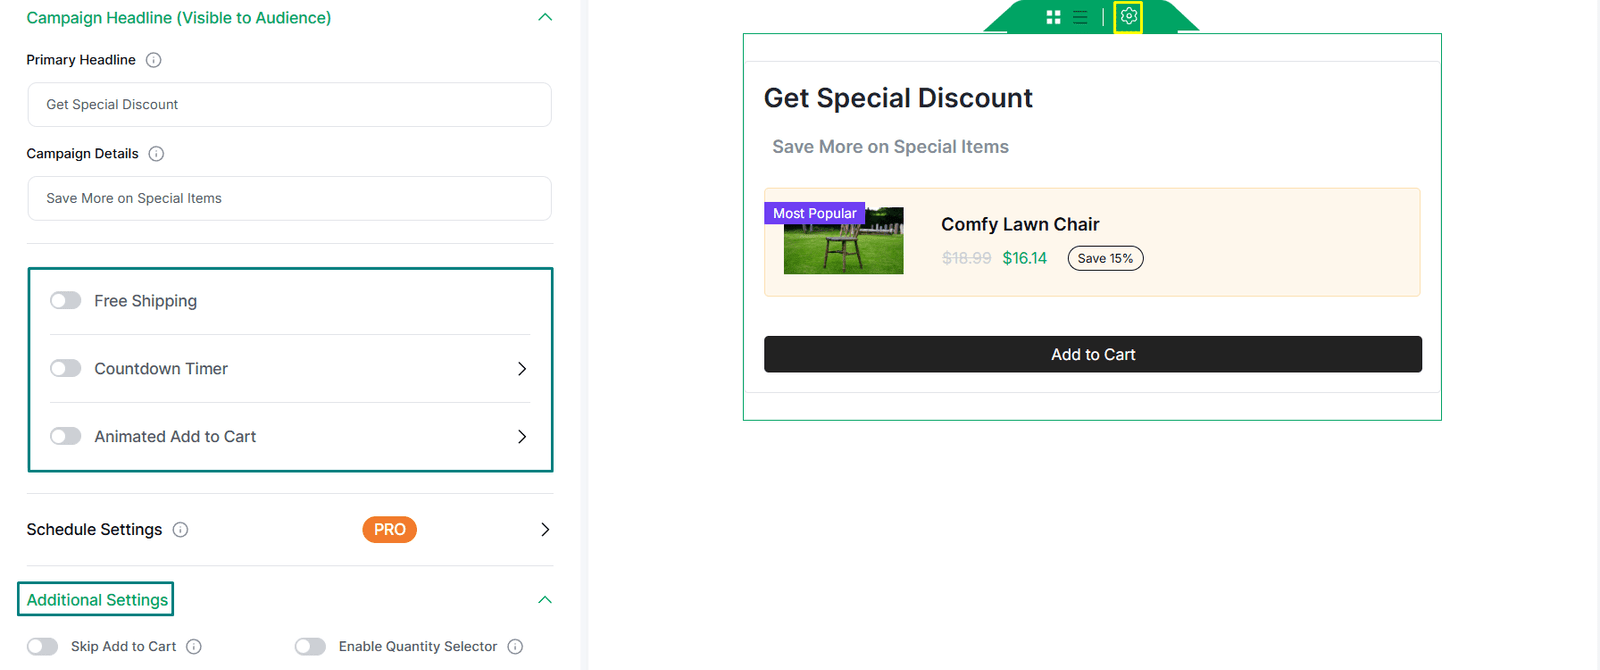
Build FOMO with EXTRA features
You can build FOMO (fear of missing out) with features like free shipping, countdown timer, etc. You can also schedule the campaign – that’s a pro feature, though.
There are some additional settings as well, and I’ll discuss them in the full review.
I forgot to mention this – you can actually change the design of the campaign. You can change the colors, typography, padding, and other design properties. You can do it all from the backend.
A Few Things Worth Mentioning…
The plugin looks and feels as it should in 2025. However, there are a couple of things I would like to mention here.
- Installing the pro version should be easier. If a user pastes the code, the pro plugin should get installed and activated ‘automatically’ on the WordPress site (do correct me if there are any issues with this!)
- The “create campaign” page should appear initially, not the dashboard.
Otherwise, the overall impression is good – the design feels modern. It’s fast and agile, doesn’t feel slow or sluggish.
More details on this plugin will be in the full review.