Setting Up Quantity-based WooCommerce Discounts with WowRevenue [Tutorial]
In this tutorial, I will show you how to create quantity-based WooCommerce discounts for products using the WowRevenue plugin on WooCommerce. Special thanks to WPXPO for providing us with a premium WowRevenue license.
Volume- or quantity-based discounts are pretty popular among online users. Individuals and small businesses very much appreciate the concept of buying products in bulk.
Generally, you get some sort of incentive for buying products in bulk. There’s usually some sort of discount based on the quantity of the items you purchase from an online store.
In many cases, you’ll find free shipping added to the mix. If the buyer chooses to purchase in large volumes, especially products that are pricey, they don’t have to pay for shipping.
In today’s tutorial, I’ll be sharing a tutorial on how to create quantity-based discounts using the WowRevenue plugin. It’s a pretty straightforward process.
I’ve already shared a ‘first impressions’ piece on WowRevenue. You can check it out here if you want a short overview.
Please note that I’m using a locally hosted WooCommerce site for this purpose. I’m using the Astra theme for this demo.
You have to do 4 things (pretty much):
- Create the volume-based discount campaign
- Set up the page display and the campaign appearance
- Set up the trigger products
- Set up the quantity-based discount tiers
- Create FOMO + Additional setup (Optional)
How to Create Quantity-based WooCommerce Discounts for products with WowRevenue?
I’m assuming you know how to install a WooCommerce plugin. It’s a straightforward process. If not, then you simply need to:
- Go to Plugins > Add New Plugin
- Search for the WowRevenue Plugin
- Install and activate the plugin
Installing the pro version is a bit tricky. I suggest you follow the plugin documentation for more information.
1. Creating a Volume Discount Campaign
Once the plugin is ready for use (installed and activated that is!), you simply need to go to WowRevenue > Campaigns and then click on Create Campaign.
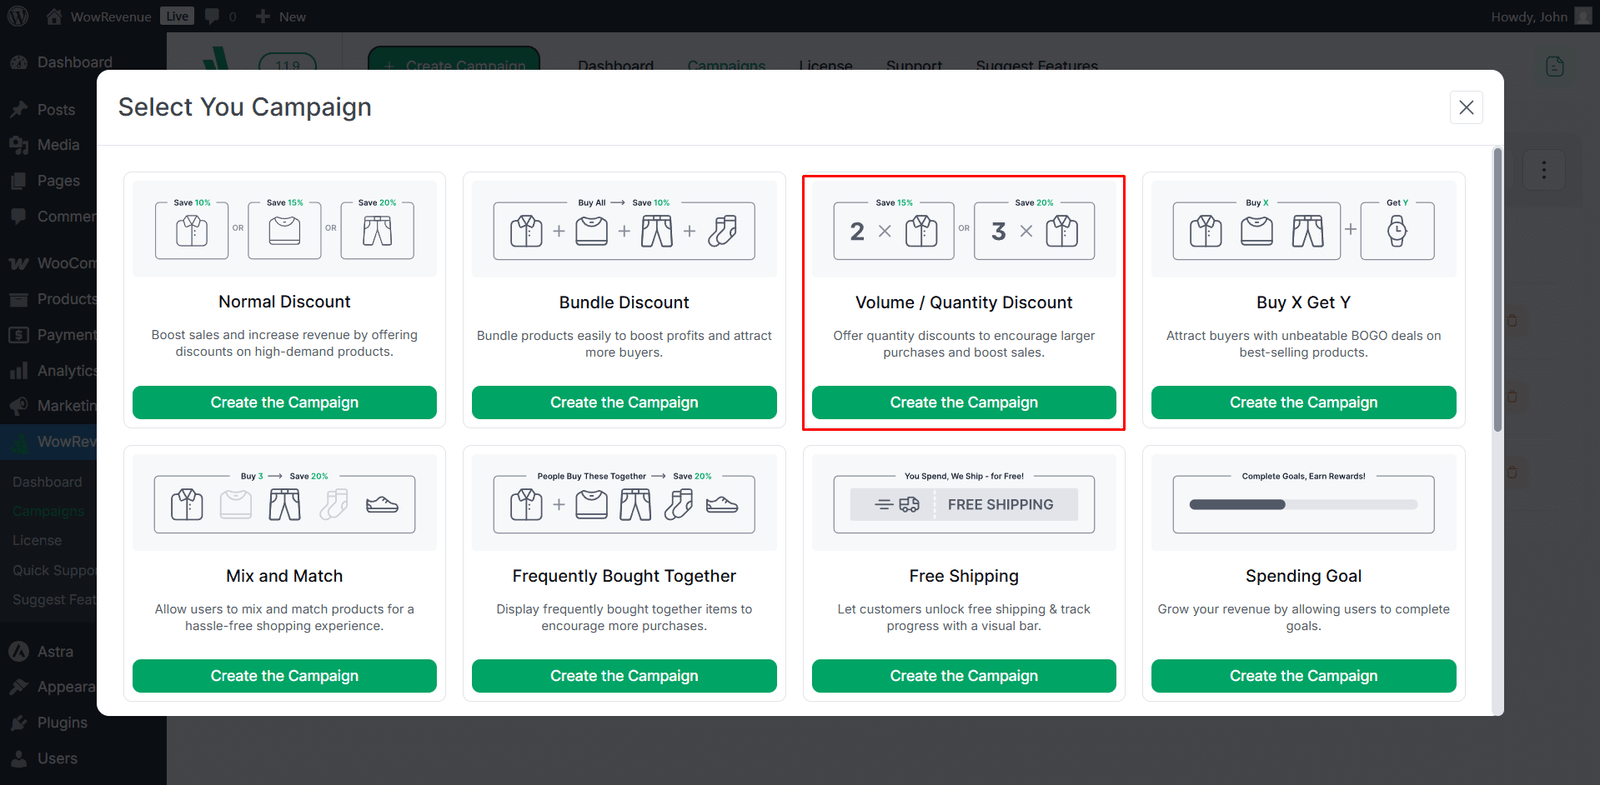
Finally, select the ‘volume/quantity’ discount campaign. After that, you’ll be taken to the campaign customizer.
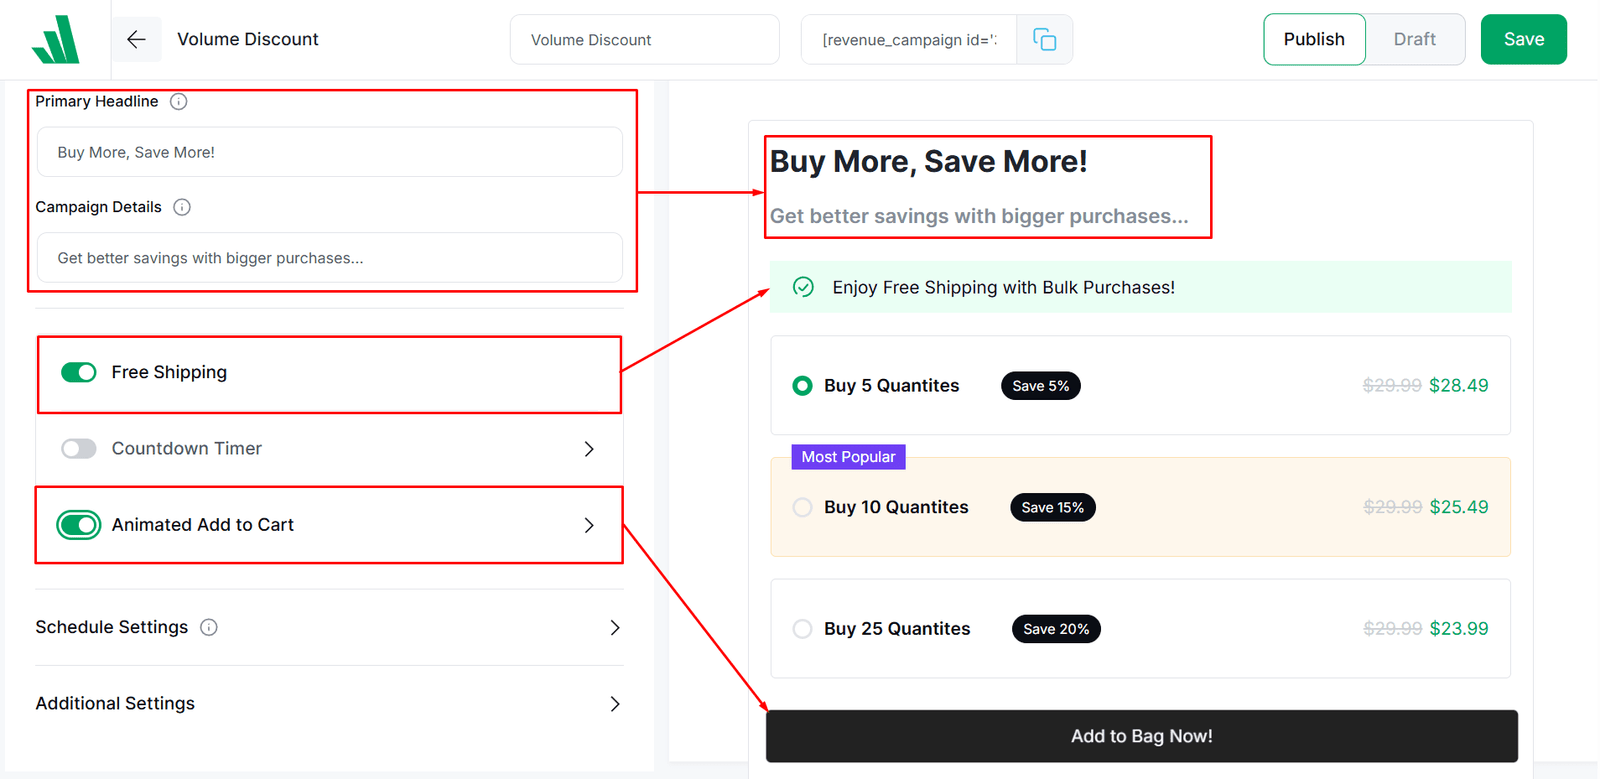
2. Setting the Page and Display Settings for the
The first thing you need to do is give the campaign a valid name, then you can move ahead with the page and display settings.
You want to set the page status and the campaign display settings. I’ve kept everything in the default state, as you can see here in the image below.
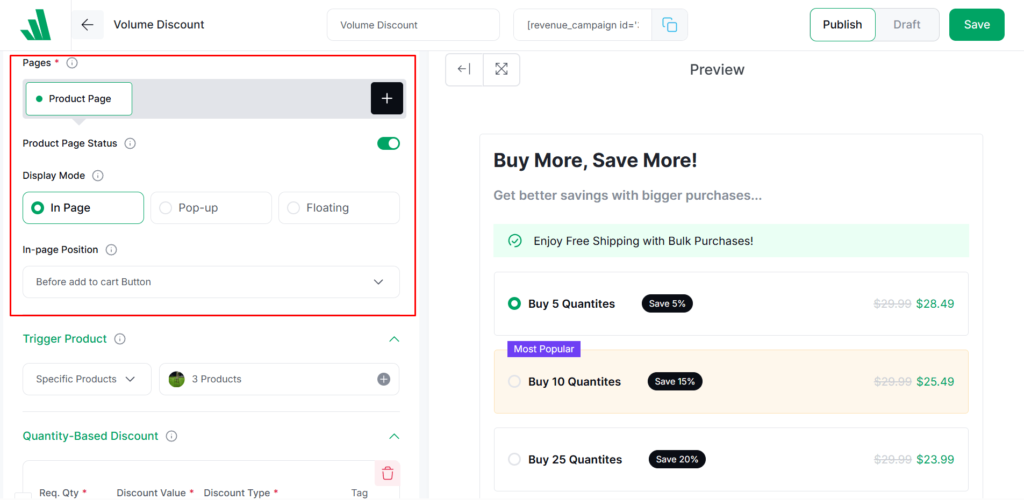
So, what will happen is that the campaign will appear on the product page, right before the add to cart button.
You do need to set the “Campaign Headlines and Details”. Of course, you’ll see them appear on the design on the right-hand side.
3. Setting Up the Trigger Products for the Campaign
The trigger product, in this case, is the item for which the WooCommerce volume discount will show up.
For example, if you choose product ‘A’ as your trigger product in the WowRevenue discount customizer and go to the product on your shop, you’ll find the discount campaign appears on that product.
In my example, I chose 3 different products as the trigger product. Meaning that for these 3 products, the volume discount will show up.
Note that you can set the product category as your trigger in WowRevenue. What happens then is that if you choose a product in that category, the discount campaign appears (if that product falls within that category).
4. Configuring the Product Discounts
This is the important part – you’ll be configuring the volume-based discount offers in this section.
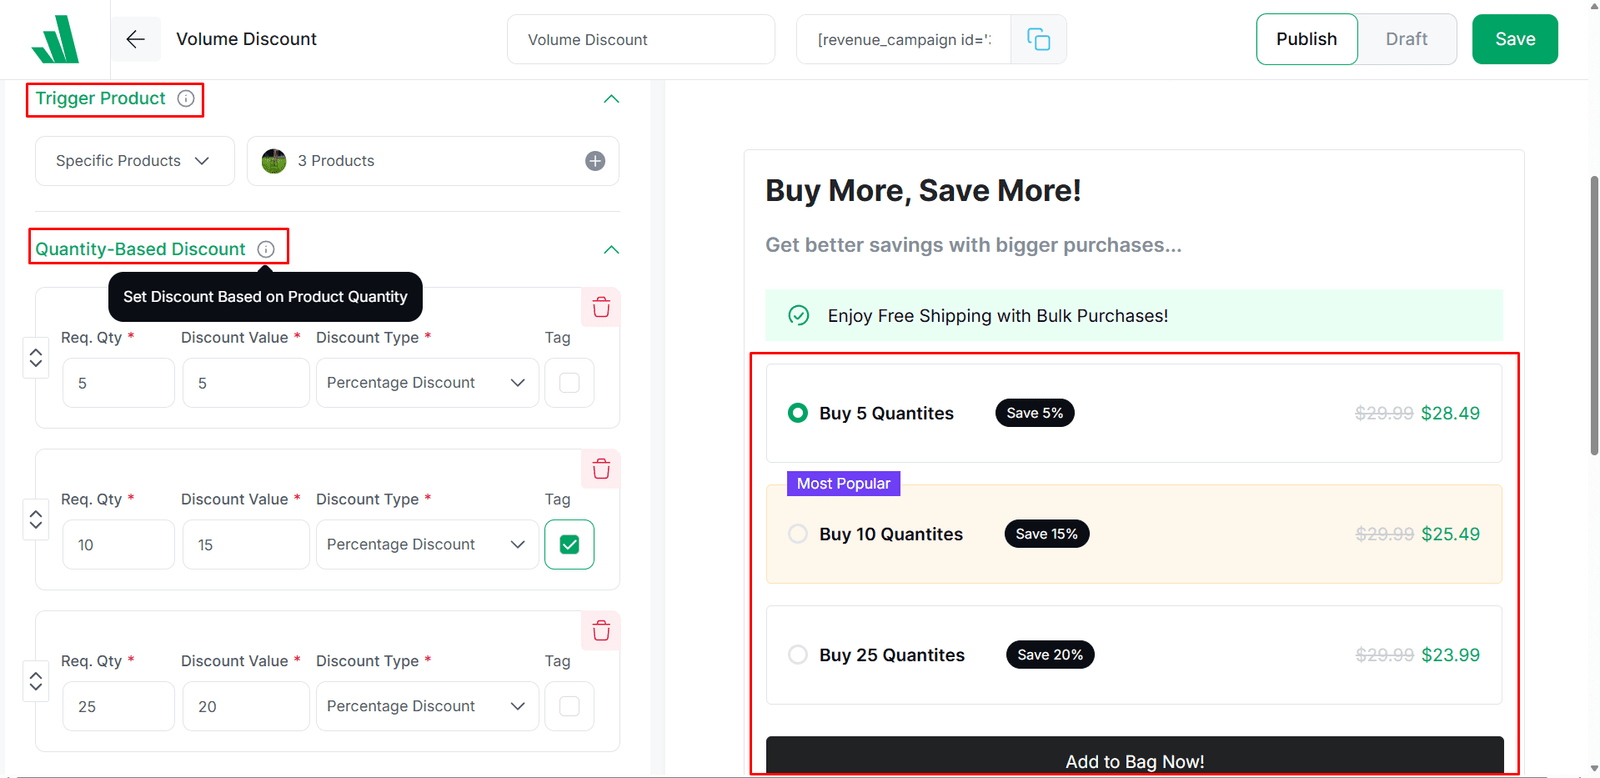
So the way I set it is this:
- I set up the discounts in 3 parts or tiers
- There are quantity-based discount offers for each tier
- I set a percentage-based discount system for each of the 3 tiers
In a way, you could call it tiered-based pricing. For each tier, the pricing increases with the product quantity.
I created a percentage-based discount system. For example, for 10 products, the discount is 15% of the total price. Please note that the pricing adjustment is on the original price. Not the sale price.
FAQs
That’s pretty much it. If you wish to offer quantity-based WooCommerce product discounts with WowRevenue, that’s all there is to it.
However, I believe you’ll have some questions. I’ll try to answer some of these frequently asked questions.
How can I create FOMO for volume-based discount offers?
There are 3 things you can do. You can either run the campaign for limited hours using the countdown timer, offer free shipping, or animate the add to cart. There are individual settings for each of these options.
Can I add as many tiers of discounts as I want?
Yes, you can. However, you will need the pro version of the plugin to add multiple tiers of bulk discount offers.
Can I customize the look and feel of the campaign?
Yes, you can. You can change certain design settings from the appearance section. They appear on the right-hand side for each campaign.
Can I send a user directly to the cart page?
Yes, you can. There is a ‘skip add to cart’ toggle. It’s in the additional settings.
Can I schedule this campaign for a certain period?
Yes, you can. You can use the schedule settings (you’ll find them in each campaign). However, you will need the pro version of the plugin for the scheduling feature to work.

How can I update the campaign?
You can update the campaign simply from the WowRevenue ‘Campaigns’ menu. All the campaigns you create will be listed here.

That’s all for today. Stay tuned for more tutorials on WowRevenue!